Prerequisites:
1. Create Selenium WebDriver Test as specified in Post# 34 Create a JUnit Selenium WebDriver Test usingSelenium IDE
2. Ensure a Compatible Firefox Browser is Installed on your machine as explained in Post#35 Ensure Compatible Firefox Browser isinstalled
1. Run the Selenium WebDriver Test
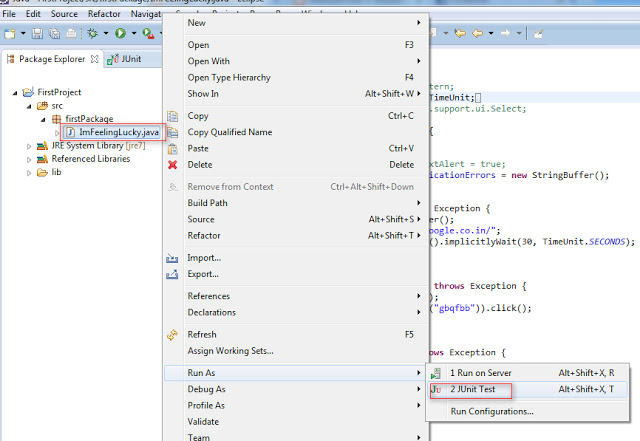
1. In Eclipse IDE, right click on the 'ImFeelingLucky' class and select 'Run As' -> 'JUnit Test' as shown below:
1. Create Selenium WebDriver Test as specified in Post# 34 Create a JUnit Selenium WebDriver Test usingSelenium IDE
2. Ensure a Compatible Firefox Browser is Installed on your machine as explained in Post#35 Ensure Compatible Firefox Browser isinstalled
1. Run the Selenium WebDriver Test
1. In Eclipse IDE, right click on the 'ImFeelingLucky' class and select 'Run As' -> 'JUnit Test' as shown below:
2. Check the Results after the test run is finished
1. After the test run is finished as shown in the above video, we've to find out whether the automation test run by Selenium WebDriver is passed or failed
2. In order to do that, view the Eclipse IDE after the test run and view the test results as shown below:

3. Red color bar will be displayed instead of Green color bar if the test gets failed.
Thats it !! This is how we run the Selenium WebDriver tests in Eclipse IDE.
No comments:
Post a Comment